Avatar
Please consider registering
Guest
Search
Forum Scope


Match


Forum Options


Minimum search word length is 3 characters - maximum search word length is 84 characters
Register Lost password?
sp_Feed sp_TopicIcon
.44 help
Avatar
machingu
Canada
Member
Members
Forum Posts: 22
Member Since:
April 5, 2009
sp_UserOfflineSmall Offline
1
September 7, 2009 - 10:16 am
sp_Permalink sp_Print sp_EditHistory

Hey Guys,

    I need help putting the trigger group back in the .44 words are good but pics are better.

Thx once again

Avatar
Charger Fan
Northern Utah

Supporter
Members


Moderators
Forum Posts: 11172
Member Since:
January 24, 2009
sp_UserOfflineSmall Offline
2
September 7, 2009 - 3:49 pm
sp_Permalink sp_Print sp_EditHistory

Well, I've heard it said that you need three hands when reassembling a .44, does that help?lol2  Actually I haven't been into a .44 yet, but others here have. Wait for some other responses.occasion

In the meantime, see if either of these help you out...

https://www.danwessonforum.com/wp-content/uploads/DW%20Disassembly.PDF

https://www.danwessonforum.com/wp-content/uploads/large-frame-manual.pdf

Avatar
machingu
Canada
Member
Members
Forum Posts: 22
Member Since:
April 5, 2009
sp_UserOfflineSmall Offline
3
September 7, 2009 - 5:10 pm
sp_Permalink sp_Print

Thx charger but the first ref. is for a 15 and the second one doesn't talk about the trigger group.

Avatar
jaggman
Emmaus, PA
Member
Members


Dans Club
Forum Posts: 1358
Member Since:
May 17, 2009
sp_UserOfflineSmall Offline
4
September 7, 2009 - 6:06 pm
sp_Permalink sp_Print

Machingu,

The first file says model 15-2 but below it says the same steps apply to a bunch of other models, .44 included. GoodLuck

Avatar
machingu
Canada
Member
Members
Forum Posts: 22
Member Since:
April 5, 2009
sp_UserOfflineSmall Offline
5
September 7, 2009 - 6:24 pm
sp_Permalink sp_Print

I saw that too jaggman but its wrong lol My poor old .44 I clean her all up today but can't get her trigger in her.

Avatar
lbruce
Georgia
Moderator
Members


DWF Supporters


Dans Club


Moderators
Forum Posts: 3569
Member Since:
November 17, 2008
sp_UserOfflineSmall Offline
6
September 8, 2009 - 4:55 am
sp_Permalink sp_Print

I feel your pain. Putting the trigger assembly back in may literally take three hands. Its been a while but IIRC hold the frame upside down and with the transfer bar and the hand in just the right position slide them in place. after 2 or 300 tries you will hit the right combo. I wish I had a secret to divulge but I don't. Just persistence. So hang in there and good luck.

LB

Wisdom is merely the realization of how little one knows, therefore I am wise.


Avatar
machingu
Canada
Member
Members
Forum Posts: 22
Member Since:
April 5, 2009
sp_UserOfflineSmall Offline
7
September 8, 2009 - 7:16 am
sp_Permalink sp_Print sp_EditHistory

lbruce, Where is the transfer bar suppose to sit?lol I can put it together without the tranfer bar np but I think I need it j/j Also does anyone know the size of the roll pin that holds the shroud to the frame?

Thx

Avatar
lbruce
Georgia
Moderator
Members


DWF Supporters


Dans Club


Moderators
Forum Posts: 3569
Member Since:
November 17, 2008
sp_UserOfflineSmall Offline
8
September 8, 2009 - 10:32 am
sp_Permalink sp_Print

Best I recall the T bar rides straight up and down and the hand passes it as the gun is cocked. It is real tricky to get all the pieces in the right place as they all have springs causing them to go places you don't want them to, but it will only work one way. With the gun cocked the T bar should be where it will be between the firing pin and the hammer when it falls. Maybe someone else can describe it better. I do not know the dia of the roll pin. Good luck

 Now I see the LoL. Ha Ha

LB

Wisdom is merely the realization of how little one knows, therefore I am wise.


Avatar
Steve
Member

Dans Club
Forum Posts: 10330
Member Since:
March 2, 2008
sp_UserOfflineSmall Offline
9
September 8, 2009 - 4:30 pm
sp_Permalink sp_Print

Off Topic, but this sounds a lot like reassembling a Ruger MK II

I went to a bookstore and asked the saleswoman "Were is the Self Help Section?" She said if she told me, it would defeat the purpose.

George Carlin

Avatar
machingu
Canada
Member
Members
Forum Posts: 22
Member Since:
April 5, 2009
sp_UserOfflineSmall Offline
10
September 9, 2009 - 2:54 pm
sp_Permalink sp_Print

lol I know there is more then just two people with .44 here.

Avatar
Supermagfan
Pennsylvania

Range Officer
Members


Range Officers


Dans Club
Forum Posts: 3250
Member Since:
February 9, 2009
sp_UserOfflineSmall Offline
11
September 9, 2009 - 3:14 pm
sp_Permalink sp_Print

I have a .44 or two but have not had any of them apart so I am not of much help in your quest for assembly info.  I know there have been others here who have had their DW's in more pieces than I.  Once the summer season is over maybe a few more of the guys will get back on line and help out your need.   

A man cannot have too many SuperMags

Avatar
LeonardC
Member
Members
Forum Posts: 185
Member Since:
June 8, 2009
sp_UserOfflineSmall Offline
12
September 10, 2009 - 12:15 pm
sp_Permalink sp_Print sp_EditHistory

Somewhere, Jody has posted instructions from Bob Milek, CENTERFIRE REVOLVERS, TROUBLESHOOTING AND TUNING.  It has instructions for both 15 and 44.

Been a long time since I've had mine apart, but the 15 has a side plate and the 44 has a trigger group.

“as close as I can type: from the above mentioned book.”

TRIGGER UNIT DISASSEMBLY

Before attempting any disassembly of this unit, study it carefully and note the relationship of the hand to the connector and the fit of the hand spring.

1. Grasp the connector and pull its pivot out of its seat in the hand.  Twisting slightly, disengage the hand spring from the hand.  The hand spring will remain attached to the connector during this operation.

2. Remove the hand spring from the connector.

3. Pull the trigger rearward and spearate the hand from the trigger body.

4. Again using a roll pin punch, drive out the trigger assembly latch retaining pin and remove the trigger assembly latch and spring.

5. Pull the trigger rearward and insert a small pin in the hole in the end of the trigger spring guide.  Release the trigger and the pin should prevent spring compression.

6. Push out the trigger pivot pin and remove the trigger, trigger return spring and trigger return sping guide.  With the guide clamped in a padded vise, compress the trigger spring, remove the pin inserted earlier and sparate the guide from the spring.

All components of the Dan Wesson .44 are reassembled in the reverse order of disassembly.

Avatar
SHOOTIST357
Colorado Springs, CO

Supporter

Range Officer
Members


Range Officers
Forum Posts: 4788
Member Since:
May 2, 2009
sp_UserOfflineSmall Offline
13
September 10, 2009 - 12:39 pm
sp_Permalink sp_Print

Steve CT said:

Off Topic, but this sounds a lot like reassembling a Ruger MK II


that's funny...laughing  I keep a copy of the ruger manual handy...

SHOOT

Avatar
IHMSA80x80
Member
Members
Forum Posts: 3014
Member Since:
April 25, 2008
sp_UserOfflineSmall Offline
14
September 10, 2009 - 2:09 pm
sp_Permalink sp_Print

Steve CT said:

Off Topic, but this sounds a lot like reassembling a Ruger MK II


If you know the secret, it only takes a minute or so. Slap

The Savantist

Avatar
machingu
Canada
Member
Members
Forum Posts: 22
Member Since:
April 5, 2009
sp_UserOfflineSmall Offline
15
September 12, 2009 - 5:12 pm
sp_Permalink sp_Print

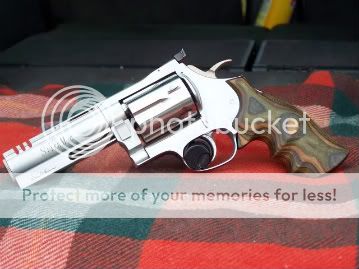
Well I found out it takes four hands and a small screw driver lol and some beer. I'll post some pics of her all cleaned up and put back together

Avatar
lbruce
Georgia
Moderator
Members


DWF Supporters


Dans Club


Moderators
Forum Posts: 3569
Member Since:
November 17, 2008
sp_UserOfflineSmall Offline
16
September 12, 2009 - 5:30 pm
sp_Permalink sp_Print

Congrats, I knew you would prevail eventually. I don't pull my trigger assemblies out on a whim, as it is tough to reassemble.Mad But once you find the combination its not to bad.Cool

LB

Wisdom is merely the realization of how little one knows, therefore I am wise.


Avatar
sioux
ATHENS GA
Member
Members
Forum Posts: 1
Member Since:
September 13, 2009
sp_UserOfflineSmall Offline
17
September 14, 2009 - 6:30 am
sp_Permalink sp_Print

HAD SAME PROBLEM YESTERDAY. I TOOK FISHING LINE 15# made a loop at the end of the line 1/4 diameter wrapped around the connector and hand pulled line thru hammer slot. also tied trigger back. set in place and pulled the loop out or use small srewdriver pull out line. hope this helps someone .

occasion

KEITH WALKER

Avatar
jaggman
Emmaus, PA
Member
Members


Dans Club
Forum Posts: 1358
Member Since:
May 17, 2009
sp_UserOfflineSmall Offline
18
September 14, 2009 - 7:00 am
sp_Permalink sp_Print

Sioux, Welcome to the DW Forum.  You seem to be a very resourceful guy so you'll do well here.  Do you have any Cool Pics to share?  We like them, you know? Based on you procedure for reassembly I think I'll not take my guns apart.
Avatar
SHOOTIST357
Colorado Springs, CO

Supporter

Range Officer
Members


Range Officers
Forum Posts: 4788
Member Since:
May 2, 2009
sp_UserOfflineSmall Offline
19
September 14, 2009 - 7:07 am
sp_Permalink sp_Print

Yea...maybe I'll just bust open a few beers before I attempt 44 repairs....Laugh

SHOOT

Avatar
cptkirk
Member
Members
Forum Posts: 6
Member Since:
September 14, 2009
sp_UserOfflineSmall Offline
20
September 14, 2009 - 6:53 pm
sp_Permalink sp_Print

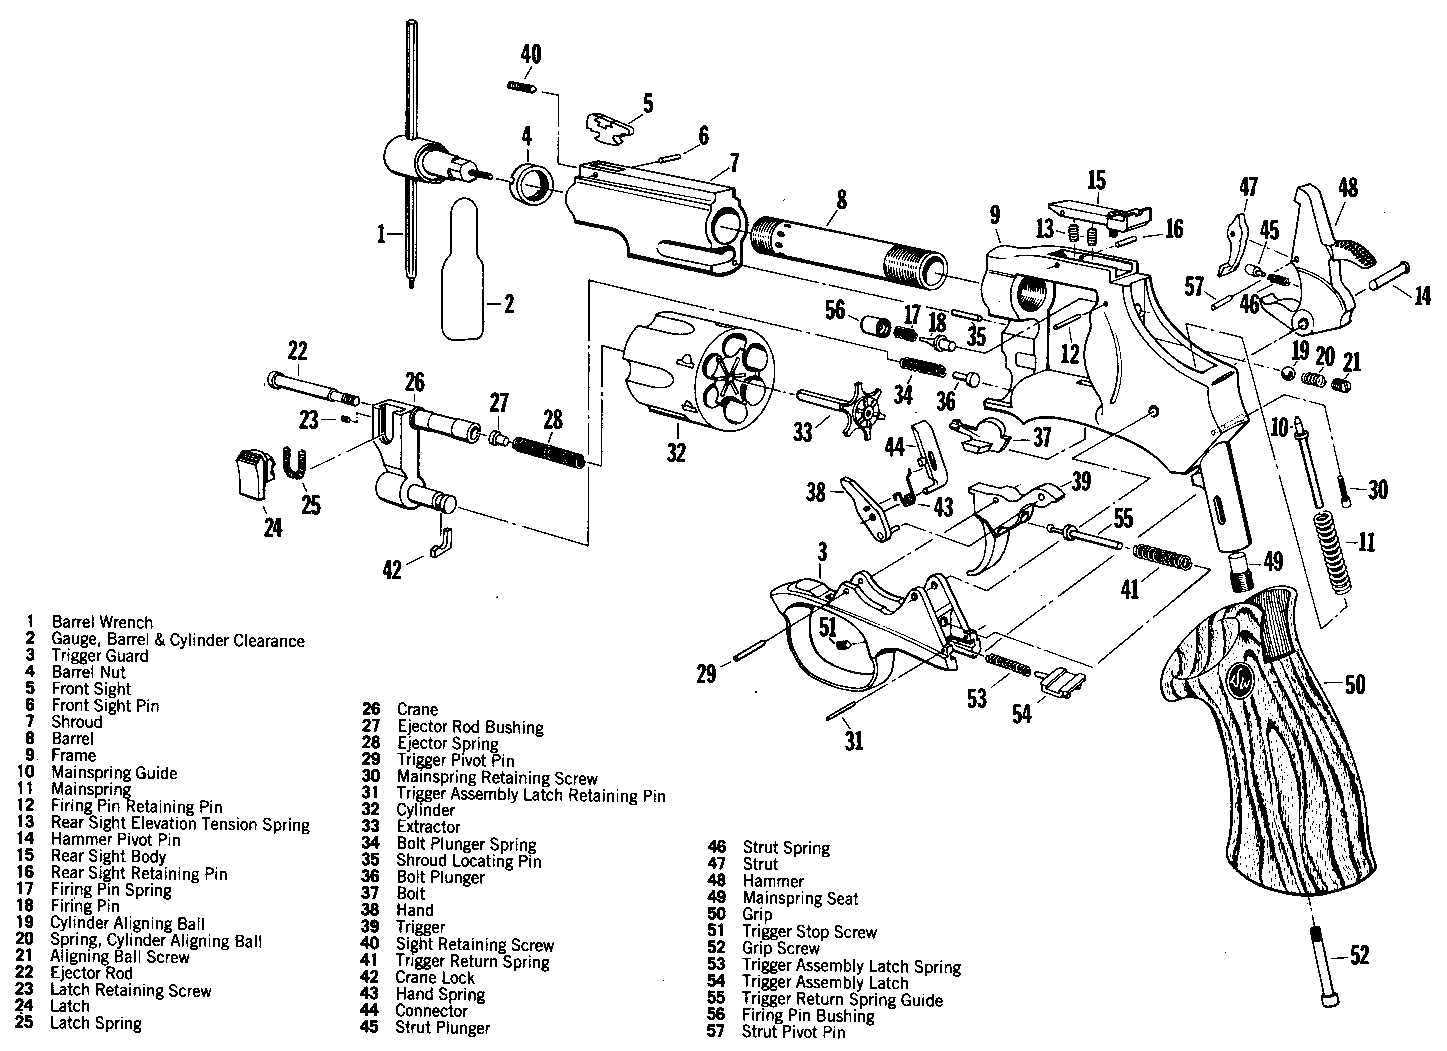
I just picked up my first DW and spent a lot of time getting a decent exploded parts diagram.  The small frames are not the same, and the manual for the large frames has a messed up parts diagram (and most are hard to read - such as the very faint rear sight).  As noted above, the smaller frame has a side plate and the larger frame has a trigger group.

Here's a set of instructions from this site I found.

https://www.danwessonforum.com/wp-content/uploads/dw_44.pdf

Also found a better parts diagram which I uploaded to the site gallery as DW 44 Diagram.jpg in full size.  I'm attaching a smaller version here (hopefully):

DW 44 DiagramImage Enlarger

Forum Timezone: America/New_York
Most Users Ever Online: 658
Currently Online:
Guest(s) 64
Currently Browsing this Page:
1 Guest(s)
Top Posters:
Steve: 10330
SHOOTIST357: 4788
Dave_Ks: 4300
Ole Dog: 4068
Stinger: 3447
Supermagfan: 3250
zoommb: 3161
IHMSA80x80: 3014
Blacktop: 3004
brucertx: 2311
Newest Members:
Ezdaddy
Edwinfam
mrpski
Myramillan
Gunner 70
Faunsewillawn
LouieCeS
Shawnrug
AnnelKix
MrBigfugh
Forum Stats:
Groups: 11
Forums: 42
Topics: 16837
Posts: 148320


Member Stats:
Guest Posters: 87
Members: 11655
Moderators: 4
Admins: 1
Administrators: Jody
Moderators: lbruce, Charger Fan, rwsem, SCORPIO